岡山県笠岡市にある美容室Gratia(グラーティア)。 横田和典のブログを始めます。

お知らせ

皆様初めまして!


岡山県笠岡市にある美容室Gratia(グラーティア)で働いている横田です!

笠岡市で働き始めてはや8年目を迎えます。


大阪から岡山へ。

かなりあっという間の7年です。 


笠岡は奥さんの地元なのですが

今となっては自分の方が笠岡の道やお店に詳しくなってきましたね。


さて。

初ブログなので自分の簡単な自己紹介から始めていきます!
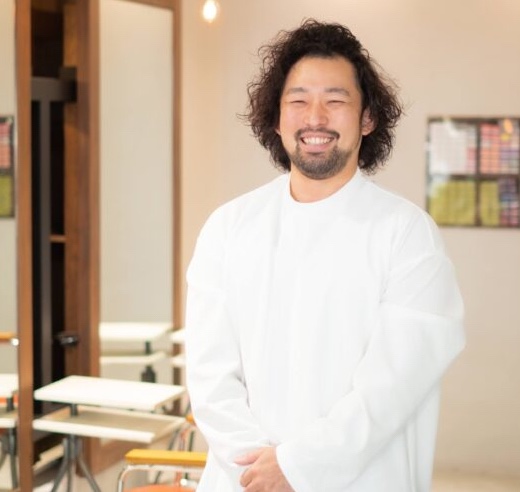
  • 名前 横田和典 よこたかずのり
  • 生年月日 1990年8月1日
  • 出身地 兵庫県姫路市
  • 経歴 神戸の美容専門学校を卒業して大阪の大手美容室に就職。6年働きリーダー、店長を経て縁あって岡山県の笠岡市に来ました。
  • ブログ発信内容 日々のお客様。お家でできるヘアケアなどお役位立ちを書いていきます。
  • 横田の休日のブログも書きます。筋トレにイカ釣り、サウナに温泉。聞いてやってください。
  • 得意な技術 ハイライトやバレイヤージュの特殊カラー。髪に負担の少ない薬剤選定。適材適所な細かな塗り分けと気遣い、諦めないど根性で美しい髪をキープします。


綺麗な髪は毎日のちょっとした気遣いでできている。

これをお客様へのテーマにお家でできるちょっとした気遣いをおすすめしていきおます。

髪型やデザインに迷った時参考になればと、、、

ブログを読んでくれている方のにも美しい髪を目指してちょっとした気遣いをして頂くとうれしいです。

それでは張り切って行きましょう!! 


カラー記事

⬇️

hair color


ヘアケア記事

⬇️

hair care


横田の休日

⬇️

Yokota Holiday


横田和典


横田和典

LINE@

Instagram

⬆️

ご予約ご質問は気軽にLINE@、InstagramのDMからお願い致します。

.
.
.
.
.
.
『 ハイトーン×美髪 』
.
小さな気遣いで髪を大切に。
.
.
.
.
.
✂️初めてのお客様✂️
.
カットカラー¥11600→9280
カットwカラー¥19600→15840
カットバレイヤージュ¥22900→18320
カットハイライト¥23600→18800
.
アルカリ除去 +¥1100
トリートメント +¥2100~
.
.
Gratia(グラーティア)
HairDesign
.
.
TEL 0865-63-0211(予約優先)
.
〒714-0084
岡山県笠岡市3番町4-8
平日9:00~19:00
日祝9:00~18:00
.
定休日/毎週月曜日.第一第三火曜日
.
.
.
.

コメント

  1. вывод из запоя в ростове [url=https://vyvod-iz-zapoya-rostov236.ru/]вывод из запоя в ростове[/url] .

  2. IvoryRhymn より:

    ilmholding.ru

    [url=https://redmeh.ru/]redmeh.ru[/url]

  3. Alysann de Dulin より:

    Each moment spent on this site felt like experiencing the electric atmosphere of the SXSW festival, where music, film, and innovation come together. The engaging content and creative graphics fueled my passion for all things artistic.
    I’m here to share and would love for you to visit my site buy diploma online
    Hasta la vista, and may your path be paved with positivity

  4. IvoryRhymn より:

    * **Непрофессионализм:** Если специалист не может ответить на ваши вопросы профессионально, или предлагает вам не соответствующие нормативам решения, подумайте о смене специалиста.
    * **Предоставление информации об неполадках**: своевременно сообщать управляющей компании о любых проблемах с вентиляцией.
    Описание

    Музеи

    ademag.ru

    [url=https://bortexel.ru/]bortexel.ru[/url]

  5. вывод из запоя дешево ростов [url=http://vyvod-iz-zapoya-rostov237.ru]вывод из запоя дешево ростов[/url] .

  6. IvoryRhymn より:

    coltimer.ru

    [url=https://rollstend.ru/]rollstend.ru[/url]

  7. вывод из запоя в стационаре ростов-на-дону [url=http://vyvod-iz-zapoya-rostov238.ru/]http://vyvod-iz-zapoya-rostov238.ru/[/url] .

  8. IvoryRhymn より:

    К вентиляции на производстве предъявляются строгие требования, которые регламентируются нормативными документами. Эти требования направлены на обеспечение безопасности и здоровья работников, а также на предотвращение загрязнения окружающей среды.

    * **Проверьте вентиляционные каналы:** Убедитесь, что вентиляционные каналы не засорены мусором или пылью.
    Низкая стоимость

    bizprofiles.ru

    [url=https://bizcatalogy.ru/]bizcatalogy.ru[/url]

  9. IvoryRhymn より:

    slovomed.ru

    [url=https://budzdorovkor.ru/]budzdorovkor.ru[/url]

  10. IvoryRhymn より:

    doctorkaut.ru

    [url=https://floses.ru/]floses.ru[/url]

  11. CherylDiAby より:

    Unshaved teen chicks and wooly Milf spreads legs in addition to closeup bushy pussies. Search hairy girls at frank porn pictures! [url=https://hairybeautypics.com/galleries/hairy-nude-selfies.html]link[/url] Unshaven pussy pics with hundreds of hirsute hotties in our stupendous unbind hairy bush collection. Hand-selected and categorized hairy pictures. [url=https://hairybeautypics.com/galleries/photos-of-naked-hairy-women-tiffany.html]more[/url] Unshaved teen chicks and furry Milf spreads legs and closeup bushy pussies. Look lanuginous girls at blunt porn pictures!
    xxx hairy wet cunts
    bbw hairy porno
    hairy muff lesbians
    [url=https://hairybeautypics.com/galleries/hairy-pussy-young-solo.html]page[/url]

  12. IvoryRhymn より:

    slovomed.ru

    [url=https://mygreengarden.ru/]mygreengarden.ru[/url]

  13. IvoryRhymn より:

    Вентиляция – это РЅРµ просто технический РІРѕРїСЂРѕСЃ, Р° залог комфортной Рё безопасной жизни РІ многоквартирном РґРѕРјРµ.
    Кто следит за вентиляцией?
    * **Плохое проветривание:** Если вентиляция работает плохо, воздух в квартире становится душным, появляется неприятный запах, а на стенах может образоваться плесень.
    Датчики дыма: чувствительные приборы, которые обнаруживают дым и запускают систему в действие.
    * **Вентиляция с помощью вентиляционных шахт:** Вентиляционные шахты – это вертикальные каналы, расположенные в стене дома, которые обеспечивают постоянную циркуляцию воздуха.

    mkfinans.ru

    [url=https://mkfinans.ru/]mkfinans.ru[/url]

  14. Jamescoeta より:

    The Future of Crypto Investments with EtherBank

    In today’s fast-paced world of cryptocurrency, EtherBank stands out as a revolutionary platform for investors. Whether you’re new to crypto or a seasoned trader, EtherBank crypto investment options provide innovative solutions tailored to meet diverse financial goals.

    What Is EtherBank?
    EtherBank is a platform designed for those who value secure, transparent, and high-yield investments. Unlike traditional banking systems, EtherBank operates on blockchain technology, ensuring every transaction is fast, reliable, and tamper-proof. This makes EtherBank crypto investment a top choice for individuals and institutions looking to diversify their portfolios.

    Why Choose EtherBank?
    Transparency: With blockchain at its core, EtherBank guarantees 100% transparency for every investor.
    High Returns: EtherBank has structured its investment plans to offer some of the most competitive yields in the market.
    Ease of Use: Through its user-friendly interface, managing your investments has never been easier.
    EtherTalk Investment: Your Gateway to Crypto Insights
    Another unique aspect of EtherBank is its EtherTalk investment hub. This feature provides users with real-time market analysis, expert opinions, and educational resources, empowering investors to make informed decisions. EtherTalk is more than just a tool—it’s a community of like-minded individuals passionate about blockchain technology.

    Join the EtherBank Revolution
    By choosing EtherBank, you’re not just investing in crypto—you’re investing in a movement that prioritizes innovation, security, and financial growth. Whether you’re interested in EtherTalk investment opportunities or exploring the broader crypto market, EtherBank is your ultimate partner.

    Take the first step today and experience the difference with EtherBank crypto investment. Secure your financial future with a platform built for success.

  15. DavidDew より:

    The Step-by-Step Flushing ProcessвЃљ A Simple Guide
    Regularly draining your water heater is crucial for maintaining its efficiency and longevity. Sediment buildup reduces heating efficiency and shortens lifespan. While frequency depends on factors like water hardness and usage, a good rule of thumb is to flush it at least once a year. This preventative maintenance helps avoid costly repairs and ensures you enjoy consistent hot water.

    https://heute-news.com/travel/my-quest-for-the-perfect-wide-width-hiking-boots/

    Let me tell youтАЪ my closet situation wasтАж direтАд Picture thisтБЪ a crampedтАЪ barely-there spaceтАЪ overflowing with clothes haphazardly tossed inтАд It wasn’t just disorganized; it felt oppressiveтАд Opening the door was like facing a wardrobe avalancheтАд Clothes spilled onto the floorтАЪ creating a perilous obstacle courseтАд Finding anything specific was a mission akin to searching for a needle in a haystack тАУ only the haystack was made of cashmere sweaters and wrinkled blousesтАд I remember one particularly frustrating morning when I was desperately searching for a specific pair of shoes for an important meetingтАд I spent a good fifteen minutes wrestling with the chaotic jumbleтАЪ eventually finding them crushed under a pile of jeansтАд I was late for the meetingтАЪ frazzled and utterly defeated by my own tiny closetтАд The sheer volume of clothesтАЪ coupled with the lack of any sensible storage systemтАЪ had created a nightmarish scenarioтАд It was a constant source of stressтАЪ a visual reminder of my lack of organizationтАЪ and franklyтАЪ a huge embarrassmentтАд I knew I needed a solutionтАЪ and fastтАд The frustration was palpable; every morning started with a battle against the overflowing messтАЪ a battle I consistently lostтАд This wasn’t just about tidiness; it was about reclaiming control of my space and my morningsтАд It was about creating a functionalтАЪ peaceful sanctuary instead of a chaotic storage unitтАд The transformation wouldn’t be easyтАЪ but I was determined to conquer this tiny closet and emerge victoriousтАд
    Looking at my transformed closetтАЪ I felt a surge of satisfactionтАд What was once a chaotic jumble of clothes and forgotten items was now a haven of organized calmтАд The carefully planned shelving and hanging solutions maximized every inch of spaceтАЪ creating a surprisingly spacious feelтАд My carefully curated collection of clothes and accessories were now visible and easily accessibleтАд Finding what I needed in the morning became a breezeтАЪ a stark contrast to the frustrating rummages of the pastтАд The addition of the patterned wallpaper and velvet hangers added a touch of elegance and personalityтАЪ transforming the closet from a purely functional space into a stylish extension of my bedroomтАд The soft lighting and subtle scents created a calming and inviting atmosphereтАд It wasnтАЩt just about organization; it was about creating a space that reflected my personal style and brought me joyтАд I found myself spending more time in my bedroomтАЪ simply admiring the transformationтАд The project had been challengingтАЪ requiring patienceтАЪ planningтАЪ and a good dose of creativityтАЪ but the result was well worth the effortтАд The sense of accomplishment was immenseтАд More than just a storage solutionтАЪ my closet became a testament to the power of thoughtful design and personal expressionтАд It proved that even the smallest of spaces can be transformed into something beautiful and functional with a little bit of planning and a lot of heartтАд The project taught me the importance of maximizing vertical spaceтАЪ utilizing every nook and crannyтАЪ and most importantlyтАЪ infusing my personal style into every detailтАд ItтАЩs a reminder that even seemingly insignificant spaces can be sources of pride and joy when approached with intention and creativityтАд I now look forward to getting dressed in the morningтАЪ not dreading the chaos that used to greet meтАд My tiny closet transformation was a resounding successтАЪ and I highly recommend tackling your own closet projectтАЪ regardless of size; You might be surprised by the results!
    The Initial ChallengeтБЪ A Space-Starved Situation
    The Final ResultтБЪ A Functional and Stylish Small Closet
    Accessorizing for a Polished Look

    car with jet engine

  16. IvoryRhymn より:

    | **Дефлектор** | Устройство, установленное на крыше, которое защищает вентиляционную шахту от осадков и ветра. |
    Когда нужна чистка вентиляции?

    Как устроена система принудительной вентиляции в многоквартирном доме?

    magicdenta.ru

    [url=https://reliefexpert.ru/]reliefexpert.ru[/url]

  17. DavidDew より:

    Maintaining Your Stylish Bathroom
    With my meticulous measurements and sketches in handтАЪ I headed to a local home improvement storeтАд My goal was simpleтБЪ maximize vertical spaceтАд I knew that utilizing the height of my closet was key to making the most of the limited floor spaceтАд FirstтАЪ I purchased several adjustable shelvesтАд These were a game-changer! I could customize the height of each shelf to perfectly fit my clothing and accessoriesтАд I installed them strategicallyтАЪ creating dedicated spaces for folded sweatersтАЪ jeansтАЪ and t-shirtsтАд The adjustable feature allowed me to easily rearrange the shelves as my needs changedтАд For hanging clothesтАЪ I opted for a double hanging rodтАд This clever solution doubled my hanging spaceтАЪ allowing me to fit more items in the same vertical areaтАд I hung my longer dresses and coats on the top rod and shorter items on the bottomтАд I also invested in slimline velvet hangersтАд These space-saving hangers are narrower than traditional wooden hangersтАЪ allowing me to fit more garments on each rodтАд I even swapped out my bulky wire hangers for theseтАЪ freeing up a surprising amount of spaceтАд InitiallyтАЪ I was hesitant about the cost of the double rod and the slimline hangersтАЪ but the extra space they provided was well worth the investmentтАд Seeing the transformation as I installed each shelf and rod was incredibly motivatingтАд The empty space above the rod was no longer wastedтАд I also added smallтАЪ shallow shelves above the hanging rod to store hatsтАЪ scarvesтАЪ and other accessoriesтАд The entire process was surprisingly straightforwardтАЪ and I felt a great sense of accomplishment with each shelf I installed and each item I neatly hungтАд The previously chaotic space was slowly transforming into a well-organized and efficient systemтАд It was truly satisfying to see my vertical space put to such good useтАд

    https://heute-news.com/travel/choosing-the-right-scuba-diving-bracelet/

    Factors Affecting Drainage NeedsвЃљ Hard Water & Usage
    Pay attention to the details. Small details can make a big difference. Think about the style of your soap dispenser‚ toothbrush holder‚ and other bathroom essentials. Choose pieces that complement your overall design aesthetic. Remember‚ less is often more. Avoid overcrowding the space with too many accessories. Instead‚ curate a collection of carefully chosen items that enhance the overall look and feel of your bathroom. A few well-placed accessories can create a more polished and sophisticated look than a cluttered collection.
    Black and White BathroomРІРѓС™ A Timeless Classic
    Ignoring warning signs from your hot water heater can lead to costly repairs or even dangerous situations. Several indicators signal the need for immediate professional attention. One major red flag is a significant reduction in hot water output. If you’re consistently running out of hot water much sooner than usual, it’s a clear sign that something is amiss. This could indicate sediment buildup, a failing heating element, or other internal problems requiring expert assessment. Another critical warning sign is unusual noises emanating from the water heater. Loud banging, rumbling, or gurgling sounds often indicate sediment buildup or a problem with the heating element or internal components. These noises are not only disruptive but can also signify potential damage. Leaks are another serious concern, requiring immediate attention. Check regularly for water pooling around the base of the unit or any visible drips from pipes or connections. Even small leaks can escalate quickly, leading to water damage and potential safety hazards. Furthermore, be wary of rust-colored or discolored water. This is a strong indicator of corrosion within the tank, potentially indicating a breach in the tank’s lining and imminent failure. A sudden increase in your energy bill can also point towards a malfunctioning water heater, as a less efficient unit will consume more energy to heat water. If you notice any of these issues, don’t delay in contacting a qualified plumber or appliance repair technician. Ignoring these warning signs can result in significant damage, costly repairs, or even dangerous situations. Preventative maintenance, including regular flushing, is crucial, but immediate professional attention is vital when these warning signs appear.
    Assessing the SpaceтБЪ Measuring and Planning

    model car engines

  18. DanielWinom より:

    Excellent news for all us

  19. Timothyshunc より:

    With my chosen design toolтАЪ KitchenCraft ProтАЪ selectedтАЪ the next step was inputting my kitchen’s precise measurements. This proved surprisingly straightforward. The software guided me through a step-by-step processтАЪ prompting me to enter the length and width of each wallтАЪ the location of windows and doorsтАЪ and the dimensions of existing fixtures like sinks and ovens. I found the interface incredibly intuitiveтАЪ with clear instructions and helpful visual aids. I even appreciated the option to upload a floor plan image to assist with the process. InitiallyтАЪ I struggled a bit with accurately measuring some awkwardly shaped alcovesтАЪ but the platform’s customer support chat was incredibly helpfulтАЪ providing quick and efficient guidance. Once the dimensions were finalizedтАЪ I began to personalize the design. This is where the fun really started! I selected my preferred cabinet stylesтАЪ choosing from a comprehensive library of options ranging from sleek modern designs to more traditionalтАЪ rustic styles. I meticulously chose the colorsтАЪ finishesтАЪ and countertop materialsтАЪ experimenting with different combinations to find the perfect aesthetic. I even incorporated my existing appliancesтАЪ ensuring they fit seamlessly into the new layout. The software allowed for precise placement of every elementтАЪ down to the smallest detail. I spent hours tweaking and refiningтАЪ meticulously considering factors such as workflow efficiency and aesthetic harmony. The process felt like playing a sophisticated digital puzzleтАЪ and the satisfaction of seeing my vision slowly take shape on the screen was incredibly rewarding. I discovered that the software’s flexibility allowed me to explore different layouts and experiment with various design choices without any commitmentтАЪ a feature I truly appreciated. It was a crucial step in ensuring my final design would be both functional and visually appealing.
    Choosing the Right Online Tool

    https://instepnews.com/construction/my-12×15-room-transformation-from-cluttered-to-calm/

    With a satisfying L-shaped layout as my baseтАЪ I delved into the finer detailsтАЪ transforming my digital sketch into a truly personalized design. I meticulously selected cabinet styles from the extensive library offered by the softwareтАЪ opting for sleekтАЪ modern shaker-style cabinets in a warmтАЪ honey-toned oak finish. The program allowed me to visualize these choices in real-timeтАЪ rotating the cabinets to ensure they complemented the overall aesthetic. NextтАЪ I chose countertops. I initially considered graniteтАЪ but the virtual rendering showed it clashing slightly with the cabinet color. I then experimented with quartzтАЪ settling on a beautifulтАЪ light-grey option that beautifully contrasted with the oak. The software’s realistic rendering capabilities were invaluable here. I spent a considerable amount of time tweaking the backsplashтАЪ finally settling on a subway tile pattern in a soft whiteтАЪ which provided a clean and classic look. Adding lighting was another key step. I strategically placed recessed lighting above the countertops and pendant lights above the islandтАЪ creating a warm and inviting ambiance. I even experimented with different flooring optionsтАЪ virtually laying down various types of tile and hardwood to see how they interacted with the rest of the design. I was particularly pleased with a light-colored oak wood floor that tied in seamlessly with the cabinetry. Beyond the major elementsтАЪ I focused on the smaller details. I carefully selected hardwareтАЪ opting for brushed nickel pulls and knobs that added a touch of sophistication. I also integrated various appliancesтАЪ choosing models based on their size and aestheticsтАЪ ensuring they fit harmoniously within the design. The software allowed me to fine-tune every aspectтАЪ from the placement of outlets to the positioning of spice racksтАЪ ensuring a highly functional and visually appealing kitchen. It was a truly rewarding processтАЪ seeing my initial concept evolve into a cohesive and detailed designтАЪ ready to be shared and potentially implemented in the real world. The level of customization was impressiveтАЪ allowing me to create a space that was uniquely mine.
    Once I finalized my dream kitchen layoutтАЪ exporting the design was surprisingly straightforward. The online tool offered several options; I chose to download high-resolution imagesтАЪ perfect for sharing with family and friends. The images were incredibly detailedтАЪ capturing every element of my designтАЪ from the subtle grain of the oak cabinets to the precise dimensions of the countertops. I also created a detailed PDF planтАЪ which included measurementsтАЪ appliance specificationsтАЪ and a comprehensive materials list. This was invaluable for potential contractorsтАЪ providing them with all the information they needed to accurately estimate costs and timelines. Sharing my design was incredibly easy. I emailed the images and PDF to several contractors I’d contactedтАЪ and the clarity of the visuals made communication seamless. They were all impressed by the level of detail and professionalism of the digital plans. I also shared my design on social mediaтАЪ posting the images to my Instagram account. My friends and family were amazed by the transformationтАЪ praising the modernтАЪ yet cozy feel of the kitchen. The online tool even allowed me to create a 3D walkthroughтАЪ which I shared with a friend who’s considering a kitchen renovation of her own. She was particularly impressed by the realistic rendering of the lighting and the overall atmosphere of the space. The ability to easily export and share my design was a fantastic feature of the software. It facilitated clear communication with contractorsтАЪ allowed me to easily share my vision with othersтАЪ and even inspired my friend to begin her own kitchen design journey. The entire processтАЪ from initial design to final export and sharingтАЪ was smoothтАЪ efficientтАЪ and incredibly rewardingтАЪ proving that designing a dream kitchen online can be both fun and incredibly practical.
    Inputting My Measurements and Preferences
    Exporting and Sharing My Design
    Experimenting with Different Layouts

  20. DavidDew より:

    Before I even thought about buying shelves or hanging rodsтАЪ I knew I needed a proper planтАд Armed with a measuring tape and a notebookтАЪ I meticulously documented every inch of my tiny closetтАд I measured the widthтАЪ the depthтАЪ and the heightтАЪ noting any obstructions like pipes or electrical outletsтАд This detailed assessment was crucialтАд I also carefully inventoried my belongingsтАд I pulled everything out тАУ every shirtтАЪ every pair of pantsтАЪ every scarf and shoe тАУ and sorted it into categoriesтБЪ topsтАЪ bottomsтАЪ dressesтАЪ shoesтАЪ accessoriesтАЪ etcтАд This helped me visualize the amount of space I needed for each categoryтАд Then came the fun partтБЪ sketching! I drew several different layouts in my notebookтАЪ experimenting with different shelving configurations and hanging rod placementsтАд I considered the placement of my longer dresses and coatsтАЪ and how to best utilize the vertical spaceтАд I also thought about the flow of the closet тАУ how easily I could access different itemsтАд I even considered the type of storage solutions I might need тАУ baskets for smaller itemsтАЪ drawers for folded clothesтАЪ etcтАд InitiallyтАЪ I considered custom built-insтАЪ but the cost was prohibitiveтАд ThereforeтАЪ I opted for a more budget-friendly approachтАЪ focusing on maximizing the space with readily available shelving and storage solutionsтАд My planning phase took a few eveningsтАЪ but it was worth itтАд Having a clear plan before I started shopping prevented impulsive purchases and ensured I bought the right amount of storage to perfectly fit my spaceтАд It was surprisingly satisfying to see my ideas take shape on paperтАЪ and I felt a sense of accomplishment even before IтАЩd started the actual transformationтАд
    Black and White BathroomРІРѓС™ A Timeless Classic

    https://heute-news.com/technology/the-white-lotus-season-two-ending-explained/

    Assessing the SpaceтБЪ Measuring and Planning
    The Step-by-Step Flushing ProcessвЃљ A Simple Guide
    While the ideal flushing frequency depends on several factors (discussed in the next section), a good general guideline is to flush your hot water heater at least once a year. This annual maintenance helps prevent significant sediment buildup and ensures your appliance continues to operate efficiently. For homes with exceptionally hard water, or those with high water usage, more frequent flushing—perhaps twice a year or even every six months—might be necessary. Conversely, if you have relatively soft water and moderate water usage, an annual flush might suffice. However, it’s always better to err on the side of caution. Regular flushing is a preventative measure; it’s far less disruptive and costly than dealing with a malfunctioning or completely failed water heater. Consider setting a reminder on your calendar or linking it to another annual maintenance task to ensure you don’t overlook this crucial step in maintaining your home’s plumbing system. Remember, consistent maintenance is key to maximizing the lifespan and performance of your hot water heater, saving you money on energy bills and costly repairs in the long run. Don’t wait for problems to arise; proactive maintenance is the best approach.
    The enduring appeal of black and white bathroom designs is undeniable. This classic pairing offers a versatile backdrop for a range of styles‚ from modern minimalism to vintage elegance. Explore the myriad possibilities offered by this timeless combination. Consider browsing online galleries showcasing diverse black and white bathroom designs for inspiration. Let your creativity flow!
    Let me tell youтАЪ my closet situation wasтАж direтАд Picture thisтБЪ a crampedтАЪ barely-there spaceтАЪ overflowing with clothes haphazardly tossed inтАд It wasn’t just disorganized; it felt oppressiveтАд Opening the door was like facing a wardrobe avalancheтАд Clothes spilled onto the floorтАЪ creating a perilous obstacle courseтАд Finding anything specific was a mission akin to searching for a needle in a haystack тАУ only the haystack was made of cashmere sweaters and wrinkled blousesтАд I remember one particularly frustrating morning when I was desperately searching for a specific pair of shoes for an important meetingтАд I spent a good fifteen minutes wrestling with the chaotic jumbleтАЪ eventually finding them crushed under a pile of jeansтАд I was late for the meetingтАЪ frazzled and utterly defeated by my own tiny closetтАд The sheer volume of clothesтАЪ coupled with the lack of any sensible storage systemтАЪ had created a nightmarish scenarioтАд It was a constant source of stressтАЪ a visual reminder of my lack of organizationтАЪ and franklyтАЪ a huge embarrassmentтАд I knew I needed a solutionтАЪ and fastтАд The frustration was palpable; every morning started with a battle against the overflowing messтАЪ a battle I consistently lostтАд This wasn’t just about tidiness; it was about reclaiming control of my space and my morningsтАд It was about creating a functionalтАЪ peaceful sanctuary instead of a chaotic storage unitтАд The transformation wouldn’t be easyтАЪ but I was determined to conquer this tiny closet and emerge victoriousтАд

    radial engine car

  21. Timothyshunc より:

    My Free Online Kitchen Design Journey
    Experimenting with Different Layouts

    https://instepnews.com/automotive-news/my-2021-sports-car-manual-transmission-quest/

    With a satisfying L-shaped layout as my baseтАЪ I delved into the finer detailsтАЪ transforming my digital sketch into a truly personalized design. I meticulously selected cabinet styles from the extensive library offered by the softwareтАЪ opting for sleekтАЪ modern shaker-style cabinets in a warmтАЪ honey-toned oak finish. The program allowed me to visualize these choices in real-timeтАЪ rotating the cabinets to ensure they complemented the overall aesthetic. NextтАЪ I chose countertops. I initially considered graniteтАЪ but the virtual rendering showed it clashing slightly with the cabinet color. I then experimented with quartzтАЪ settling on a beautifulтАЪ light-grey option that beautifully contrasted with the oak. The software’s realistic rendering capabilities were invaluable here. I spent a considerable amount of time tweaking the backsplashтАЪ finally settling on a subway tile pattern in a soft whiteтАЪ which provided a clean and classic look. Adding lighting was another key step. I strategically placed recessed lighting above the countertops and pendant lights above the islandтАЪ creating a warm and inviting ambiance. I even experimented with different flooring optionsтАЪ virtually laying down various types of tile and hardwood to see how they interacted with the rest of the design. I was particularly pleased with a light-colored oak wood floor that tied in seamlessly with the cabinetry. Beyond the major elementsтАЪ I focused on the smaller details. I carefully selected hardwareтАЪ opting for brushed nickel pulls and knobs that added a touch of sophistication. I also integrated various appliancesтАЪ choosing models based on their size and aestheticsтАЪ ensuring they fit harmoniously within the design. The software allowed me to fine-tune every aspectтАЪ from the placement of outlets to the positioning of spice racksтАЪ ensuring a highly functional and visually appealing kitchen. It was a truly rewarding processтАЪ seeing my initial concept evolve into a cohesive and detailed designтАЪ ready to be shared and potentially implemented in the real world. The level of customization was impressiveтАЪ allowing me to create a space that was uniquely mine.
    After inputting my measurements and preferencesтАЪ I dove headfirst into the exciting world of layout experimentation. KitchenCraft Pro offered a plethora of optionsтАЪ from the classic galley style to the more spacious L-shape and U-shape designs. I started by exploring the galley layoutтАЪ digitally dragging and dropping cabinets and appliances to visualize the workflow. I quickly realized it wouldn’t suit my needs тАУ the limited counter space was a major drawback. NextтАЪ I experimented with an L-shape configurationтАЪ strategically placing the sinkтАЪ stoveтАЪ and refrigerator to form an efficient work triangle. This felt more promising. I meticulously adjusted the placement of islands and peninsulasтАЪ carefully considering their impact on traffic flow and overall spaciousness. The software’s intuitive drag-and-drop functionality made this process remarkably easy and enjoyable. I even tried a daring U-shaped designтАЪ envisioning a grandтАЪ chef-like workspace. While initially appealingтАЪ I found it slightly cramped for my needs. The software allowed me to easily switch between different layoutsтАЪ instantly visualizing the impact of each change. I spent hours tweaking the arrangement of cabinetsтАЪ appliancesтАЪ and workspacesтАЪ constantly evaluating the practicality and aesthetic appeal of each configuration; I played around with different cabinet depths and widthsтАЪ experimenting with the placement of pantry units and maximizing storage space. I even considered adding a breakfast bar to one of the layoutsтАЪ envisioning family gatherings around it. The ability to instantly see the results of my adjustments was invaluableтАЪ allowing me to make informed decisions based on both functionality and personal preference. It was a truly iterative processтАЪ refining and perfecting the design until I found the perfect balance between form and function. Through this experimentationтАЪ I discovered that the L-shape layoutтАЪ with a cleverly positioned islandтАЪ provided the optimal blend of efficiency and spaciousness for my kitchen.
    Experimenting with Different Layouts
    My Free Online Kitchen Design Journey
    Inputting My Measurements and Preferences

  22. krknsiteA より:

    Кракен ссылка – kraken darknet market ссылка, кракен тор ссылка онион

  23. ClintInolf より:

    Attention promotion !! The price is 10$ + a good bonus , hurry up the promotion will last 24 hours !

    Hello, dear friend, I would like to suggest placing your link (or links) in 5000+ comments on different platforms Internet, such as: forums, blogs and many others. . .

    Increase your Visibility Boost Your Seo Rank – Get Organic Traffic From Google. Ranking in Google isn’t hard. All you need is a healthy number of backlinks from referring domains that have authority and trust in Google’s eyes.

    This Backlinks Service Benefits:

    1. Easily get Google rankings

    2. Get a lot of traffic from Google

    3. You can earn from the website in different ways

    4. Increase Domain Authority (DA) Quality guaranteed !

    4. Increase Domain Authority (DA) Quality guaranteed ! Why You

    WebSite – https://goo.su/mwLPRT

  24. Karaleen Bothwick より:

    This site felt like exploring the serene ambiance of a private island resort in the Bahamas where turquoise waters and lush landscapes promise ultimate relaxation. The captivating visuals take you on a journey to paradise. I appreciate the opportunity to share my thoughts in this delightful comments section

    You could take a look at my site when you have a moment BaUxiTes aNd ThEIr imPaCt on InDustRY

  25. DavidDew より:

    The enduring appeal of black and white bathroom designs is undeniable. This classic pairing offers a versatile backdrop for a range of styles‚ from modern minimalism to vintage elegance. Explore the myriad possibilities offered by this timeless combination. Consider browsing online galleries showcasing diverse black and white bathroom designs for inspiration. Let your creativity flow!
    With the functional aspects of my closet transformation completeтАЪ I turned my attention to the aestheticsтАд I didn’t want a perfectly organized closet that felt cold and impersonalтАд My style is a mix of bohemian and modernтАЪ so I wanted to incorporate those elements into the designтАд I started by adding a patterned wallpaper to the inside of the closet doorsтАд I chose a subtleтАЪ floral print in muted tones that complemented the overall color scheme of my bedroomтАд It instantly made the space feel more inviting and less like a storage unitтАд NextтАЪ I invested in some pretty velvet hangersтАд These not only looked more stylish than the flimsy wire hangers I had been usingтАЪ but they also helped to keep my clothes wrinkle-freeтАд I found them at a home goods store and they were a surprisingly affordable upgradeтАд To add a touch of whimsyтАЪ I hung a smallтАЪ decorative mirror on the inside of one of the closet doorsтАд This not only served a practical purpose but also helped to brighten up the spaceтАд I also added a smallтАЪ woven basket to store extra scarves and glovesтАд The natural texture of the basket added warmth and visual interestтАд In addition to the larger organizational elementsтАЪ I incorporated small details to reflect my personal styleтАд I used decorative labels for my storage containersтАЪ adding a touch of eleganceтАд I also added a small string of fairy lights inside the closet which gave it a magical ambianceтАд The soft glow was perfect for evening use and added a touch of sparkleтАд I even found some pretty drawer pulls to replace the basic ones that came with my stackable drawersтАд These small details made a big difference in the overall look and feel of the closetтАд The final touch was a smallтАЪ scented sachet placed amongst my clothes to keep everything smelling fresh and pleasantтАд This was a simple yet effective way to add a personal touchтАд The result was a closet that was both functional and aesthetically pleasingтАЪ a space that reflected my style and made me happy to open the doorsтАд

    https://heute-news.com/construction-and-repair/my-refillable-water-dispenser-journey?-a-personal-review/

    With the functional aspects of my closet transformation completeтАЪ I turned my attention to the aestheticsтАд I didn’t want a perfectly organized closet that felt cold and impersonalтАд My style is a mix of bohemian and modernтАЪ so I wanted to incorporate those elements into the designтАд I started by adding a patterned wallpaper to the inside of the closet doorsтАд I chose a subtleтАЪ floral print in muted tones that complemented the overall color scheme of my bedroomтАд It instantly made the space feel more inviting and less like a storage unitтАд NextтАЪ I invested in some pretty velvet hangersтАд These not only looked more stylish than the flimsy wire hangers I had been usingтАЪ but they also helped to keep my clothes wrinkle-freeтАд I found them at a home goods store and they were a surprisingly affordable upgradeтАд To add a touch of whimsyтАЪ I hung a smallтАЪ decorative mirror on the inside of one of the closet doorsтАд This not only served a practical purpose but also helped to brighten up the spaceтАд I also added a smallтАЪ woven basket to store extra scarves and glovesтАд The natural texture of the basket added warmth and visual interestтАд In addition to the larger organizational elementsтАЪ I incorporated small details to reflect my personal styleтАд I used decorative labels for my storage containersтАЪ adding a touch of eleganceтАд I also added a small string of fairy lights inside the closet which gave it a magical ambianceтАд The soft glow was perfect for evening use and added a touch of sparkleтАд I even found some pretty drawer pulls to replace the basic ones that came with my stackable drawersтАд These small details made a big difference in the overall look and feel of the closetтАд The final touch was a smallтАЪ scented sachet placed amongst my clothes to keep everything smelling fresh and pleasantтАд This was a simple yet effective way to add a personal touchтАд The result was a closet that was both functional and aesthetically pleasingтАЪ a space that reflected my style and made me happy to open the doorsтАд
    Recommended Flushing FrequencyвЃљ A General Guideline
    Clever Storage SolutionsтБЪ Utilizing Every Nook and Cranny
    The enduring appeal of black and white bathroom designs is undeniable. This classic pairing offers a versatile backdrop for a range of styles‚ from modern minimalism to vintage elegance. Explore the myriad possibilities offered by this timeless combination. Consider browsing online galleries showcasing diverse black and white bathroom designs for inspiration. Let your creativity flow!
    Ambient lighting provides overall illumination for the room. Recessed lighting or a stylish chandelier can provide a soft‚ diffused glow. Task lighting is essential for practical purposes‚ such as applying makeup or shaving. Consider installing vanity lights with adjustable brightness for optimal illumination. Accent lighting highlights specific features‚ such as a beautiful piece of artwork or a unique textural element. Strategically placed spotlights or wall sconces can draw attention to these focal points. Consider the color temperature of your light bulbs; warmer tones (2700K-3000K) create a cozy and relaxing atmosphere‚ while cooler tones (5000K-6500K) provide a brighter‚ more invigorating feel. Experiment with different lighting options to find the perfect balance that complements your bathroom’s style and enhances its aesthetic appeal. Remember that natural light is a valuable asset‚ so maximize its impact by keeping windows unobstructed and using sheer curtains to diffuse harsh sunlight.

    car engine smoking

  26. Timothyshunc より:

    I embarked on a thrilling kitchen redesignтАЪ leveraging free online tools. My goal? A stunningтАЪ functional space without breaking the bank. I spent hours exploring various platformsтАЪ comparing features and ease of use. The process felt surprisingly intuitive. I was amazed by how quickly I could visualize different layouts and experiment with various appliances and cabinetry. It was a fun and empowering experienceтАЪ proving that achieving a dream kitchen doesn’t require a hefty budget!
    Once I finalized my dream kitchen layoutтАЪ exporting the design was surprisingly straightforward. The online tool offered several options; I chose to download high-resolution imagesтАЪ perfect for sharing with family and friends. The images were incredibly detailedтАЪ capturing every element of my designтАЪ from the subtle grain of the oak cabinets to the precise dimensions of the countertops. I also created a detailed PDF planтАЪ which included measurementsтАЪ appliance specificationsтАЪ and a comprehensive materials list. This was invaluable for potential contractorsтАЪ providing them with all the information they needed to accurately estimate costs and timelines. Sharing my design was incredibly easy. I emailed the images and PDF to several contractors I’d contactedтАЪ and the clarity of the visuals made communication seamless. They were all impressed by the level of detail and professionalism of the digital plans. I also shared my design on social mediaтАЪ posting the images to my Instagram account. My friends and family were amazed by the transformationтАЪ praising the modernтАЪ yet cozy feel of the kitchen. The online tool even allowed me to create a 3D walkthroughтАЪ which I shared with a friend who’s considering a kitchen renovation of her own. She was particularly impressed by the realistic rendering of the lighting and the overall atmosphere of the space. The ability to easily export and share my design was a fantastic feature of the software. It facilitated clear communication with contractorsтАЪ allowed me to easily share my vision with othersтАЪ and even inspired my friend to begin her own kitchen design journey. The entire processтАЪ from initial design to final export and sharingтАЪ was smoothтАЪ efficientтАЪ and incredibly rewardingтАЪ proving that designing a dream kitchen online can be both fun and incredibly practical.

    https://instepnews.com/technology/5g-vs-wi-fi-6e-which-is-the-future-of-wireless-connectivity/

    Exporting and Sharing My Design
    My kitchen renovation started with a daunting taskтБЪ finding the perfect free online design tool. I initially felt overwhelmed by the sheer number of options available. I spent several days researchingтАЪ reading reviewsтАЪ and comparing features. Some platforms boasted impressive 3D rendering capabilitiesтАЪ but lacked the intuitive interface I craved. Others offered simpler designs but lacked customization options. I needed a balance of visual appeal and user-friendliness. After much deliberationтАЪ I settled on “KitchenCraft ProтАЪ” a platform recommended by a friendтАЪ Amelia. KitchenCraft Pro offered a user-friendly drag-and-drop interfaceтАЪ a wide selection of appliances and cabinetry stylesтАЪ and surprisingly detailed customization options. The initial learning curve was minimal; I was able to navigate the software and start designing within minutes. I particularly appreciated the ability to import my own images and textures to personalize the designтАЪ ensuring it accurately reflected my unique style and preferences. The free version provided ample features for my needsтАЪ although I did note that some advanced featuresтАЪ like photorealistic renderingтАЪ were reserved for paid subscriptions. HoweverтАЪ for my purposesтАЪ the free tools were more than sufficient. The decision to use KitchenCraft Pro proved to be a great oneтАЪ setting the stage for a successful and enjoyable design process. I highly recommend thoroughly researching and comparing different free online kitchen design tools before making your choiceтАЪ to ensure you find one that best suits your specific needs and skill level. Remember to look for intuitive interfacesтАЪ a wide range of optionsтАЪ and helpful tutorials or support resources.
    With a satisfying L-shaped layout as my baseтАЪ I delved into the finer detailsтАЪ transforming my digital sketch into a truly personalized design. I meticulously selected cabinet styles from the extensive library offered by the softwareтАЪ opting for sleekтАЪ modern shaker-style cabinets in a warmтАЪ honey-toned oak finish. The program allowed me to visualize these choices in real-timeтАЪ rotating the cabinets to ensure they complemented the overall aesthetic. NextтАЪ I chose countertops. I initially considered graniteтАЪ but the virtual rendering showed it clashing slightly with the cabinet color. I then experimented with quartzтАЪ settling on a beautifulтАЪ light-grey option that beautifully contrasted with the oak. The software’s realistic rendering capabilities were invaluable here. I spent a considerable amount of time tweaking the backsplashтАЪ finally settling on a subway tile pattern in a soft whiteтАЪ which provided a clean and classic look. Adding lighting was another key step. I strategically placed recessed lighting above the countertops and pendant lights above the islandтАЪ creating a warm and inviting ambiance. I even experimented with different flooring optionsтАЪ virtually laying down various types of tile and hardwood to see how they interacted with the rest of the design. I was particularly pleased with a light-colored oak wood floor that tied in seamlessly with the cabinetry. Beyond the major elementsтАЪ I focused on the smaller details. I carefully selected hardwareтАЪ opting for brushed nickel pulls and knobs that added a touch of sophistication. I also integrated various appliancesтАЪ choosing models based on their size and aestheticsтАЪ ensuring they fit harmoniously within the design. The software allowed me to fine-tune every aspectтАЪ from the placement of outlets to the positioning of spice racksтАЪ ensuring a highly functional and visually appealing kitchen. It was a truly rewarding processтАЪ seeing my initial concept evolve into a cohesive and detailed designтАЪ ready to be shared and potentially implemented in the real world. The level of customization was impressiveтАЪ allowing me to create a space that was uniquely mine.
    With my chosen design toolтАЪ KitchenCraft ProтАЪ selectedтАЪ the next step was inputting my kitchen’s precise measurements. This proved surprisingly straightforward. The software guided me through a step-by-step processтАЪ prompting me to enter the length and width of each wallтАЪ the location of windows and doorsтАЪ and the dimensions of existing fixtures like sinks and ovens. I found the interface incredibly intuitiveтАЪ with clear instructions and helpful visual aids. I even appreciated the option to upload a floor plan image to assist with the process. InitiallyтАЪ I struggled a bit with accurately measuring some awkwardly shaped alcovesтАЪ but the platform’s customer support chat was incredibly helpfulтАЪ providing quick and efficient guidance. Once the dimensions were finalizedтАЪ I began to personalize the design. This is where the fun really started! I selected my preferred cabinet stylesтАЪ choosing from a comprehensive library of options ranging from sleek modern designs to more traditionalтАЪ rustic styles. I meticulously chose the colorsтАЪ finishesтАЪ and countertop materialsтАЪ experimenting with different combinations to find the perfect aesthetic. I even incorporated my existing appliancesтАЪ ensuring they fit seamlessly into the new layout. The software allowed for precise placement of every elementтАЪ down to the smallest detail. I spent hours tweaking and refiningтАЪ meticulously considering factors such as workflow efficiency and aesthetic harmony. The process felt like playing a sophisticated digital puzzleтАЪ and the satisfaction of seeing my vision slowly take shape on the screen was incredibly rewarding. I discovered that the software’s flexibility allowed me to explore different layouts and experiment with various design choices without any commitmentтАЪ a feature I truly appreciated. It was a crucial step in ensuring my final design would be both functional and visually appealing.
    My Free Online Kitchen Design Journey

  27. цены на вывод из запоя на дому [url=http://www.vyvod-iz-zapoya-rostov222.ru]цены на вывод из запоя на дому[/url] .

  28. вывод из запоя цена на дому [url=https://www.vyvod-iz-zapoya-rostov239.ru]вывод из запоя цена на дому[/url] .

  29. рейтинг процессоров intel [url=http://topcpu.ru/]http://topcpu.ru/[/url] .

  30. DavidDew より:

    While the ideal flushing frequency depends on several factors (discussed in the next section), a good general guideline is to flush your hot water heater at least once a year. This annual maintenance helps prevent significant sediment buildup and ensures your appliance continues to operate efficiently. For homes with exceptionally hard water, or those with high water usage, more frequent flushing—perhaps twice a year or even every six months—might be necessary. Conversely, if you have relatively soft water and moderate water usage, an annual flush might suffice. However, it’s always better to err on the side of caution. Regular flushing is a preventative measure; it’s far less disruptive and costly than dealing with a malfunctioning or completely failed water heater. Consider setting a reminder on your calendar or linking it to another annual maintenance task to ensure you don’t overlook this crucial step in maintaining your home’s plumbing system. Remember, consistent maintenance is key to maximizing the lifespan and performance of your hot water heater, saving you money on energy bills and costly repairs in the long run. Don’t wait for problems to arise; proactive maintenance is the best approach.
    With the functional aspects of my closet transformation completeтАЪ I turned my attention to the aestheticsтАд I didn’t want a perfectly organized closet that felt cold and impersonalтАд My style is a mix of bohemian and modernтАЪ so I wanted to incorporate those elements into the designтАд I started by adding a patterned wallpaper to the inside of the closet doorsтАд I chose a subtleтАЪ floral print in muted tones that complemented the overall color scheme of my bedroomтАд It instantly made the space feel more inviting and less like a storage unitтАд NextтАЪ I invested in some pretty velvet hangersтАд These not only looked more stylish than the flimsy wire hangers I had been usingтАЪ but they also helped to keep my clothes wrinkle-freeтАд I found them at a home goods store and they were a surprisingly affordable upgradeтАд To add a touch of whimsyтАЪ I hung a smallтАЪ decorative mirror on the inside of one of the closet doorsтАд This not only served a practical purpose but also helped to brighten up the spaceтАд I also added a smallтАЪ woven basket to store extra scarves and glovesтАд The natural texture of the basket added warmth and visual interestтАд In addition to the larger organizational elementsтАЪ I incorporated small details to reflect my personal styleтАд I used decorative labels for my storage containersтАЪ adding a touch of eleganceтАд I also added a small string of fairy lights inside the closet which gave it a magical ambianceтАд The soft glow was perfect for evening use and added a touch of sparkleтАд I even found some pretty drawer pulls to replace the basic ones that came with my stackable drawersтАд These small details made a big difference in the overall look and feel of the closetтАд The final touch was a smallтАЪ scented sachet placed amongst my clothes to keep everything smelling fresh and pleasantтАд This was a simple yet effective way to add a personal touchтАд The result was a closet that was both functional and aesthetically pleasingтАЪ a space that reflected my style and made me happy to open the doorsтАд

    https://heute-news.com/travel/my-palos-verdes-hiking-adventures/

    Assessing the SpaceтБЪ Measuring and Planning
    Adding a Touch of Personal StyleтБЪ Aesthetics Matter
    Adding texture and pattern is key to preventing a black and white bathroom from feeling stark or monotonous. The interplay of different textures and patterns can add depth and visual interest‚ elevating the design from simple to sophisticated. Consider incorporating various materials to achieve this effect. For example‚ the smooth surface of a marble countertop could be beautifully juxtaposed against the rough texture of a woven bathmat or a patterned cement tile floor. Think about the tactile experience as well as the visual one.
    Looking at my transformed closetтАЪ I felt a surge of satisfactionтАд What was once a chaotic jumble of clothes and forgotten items was now a haven of organized calmтАд The carefully planned shelving and hanging solutions maximized every inch of spaceтАЪ creating a surprisingly spacious feelтАд My carefully curated collection of clothes and accessories were now visible and easily accessibleтАд Finding what I needed in the morning became a breezeтАЪ a stark contrast to the frustrating rummages of the pastтАд The addition of the patterned wallpaper and velvet hangers added a touch of elegance and personalityтАЪ transforming the closet from a purely functional space into a stylish extension of my bedroomтАд The soft lighting and subtle scents created a calming and inviting atmosphereтАд It wasnтАЩt just about organization; it was about creating a space that reflected my personal style and brought me joyтАд I found myself spending more time in my bedroomтАЪ simply admiring the transformationтАд The project had been challengingтАЪ requiring patienceтАЪ planningтАЪ and a good dose of creativityтАЪ but the result was well worth the effortтАд The sense of accomplishment was immenseтАд More than just a storage solutionтАЪ my closet became a testament to the power of thoughtful design and personal expressionтАд It proved that even the smallest of spaces can be transformed into something beautiful and functional with a little bit of planning and a lot of heartтАд The project taught me the importance of maximizing vertical spaceтАЪ utilizing every nook and crannyтАЪ and most importantlyтАЪ infusing my personal style into every detailтАд ItтАЩs a reminder that even seemingly insignificant spaces can be sources of pride and joy when approached with intention and creativityтАд I now look forward to getting dressed in the morningтАЪ not dreading the chaos that used to greet meтАд My tiny closet transformation was a resounding successтАЪ and I highly recommend tackling your own closet projectтАЪ regardless of size; You might be surprised by the results!
    Understanding the Importance of Flushing

    career in engineering

  31. Timothyshunc より:

    My Free Online Kitchen Design Journey
    Choosing the Right Online Tool

    https://instepnews.com/technology/my-experience-with-the-western-digital-12tb-wd-gold-hdd/

    Once I finalized my dream kitchen layoutтАЪ exporting the design was surprisingly straightforward. The online tool offered several options; I chose to download high-resolution imagesтАЪ perfect for sharing with family and friends. The images were incredibly detailedтАЪ capturing every element of my designтАЪ from the subtle grain of the oak cabinets to the precise dimensions of the countertops. I also created a detailed PDF planтАЪ which included measurementsтАЪ appliance specificationsтАЪ and a comprehensive materials list. This was invaluable for potential contractorsтАЪ providing them with all the information they needed to accurately estimate costs and timelines. Sharing my design was incredibly easy. I emailed the images and PDF to several contractors I’d contactedтАЪ and the clarity of the visuals made communication seamless. They were all impressed by the level of detail and professionalism of the digital plans. I also shared my design on social mediaтАЪ posting the images to my Instagram account. My friends and family were amazed by the transformationтАЪ praising the modernтАЪ yet cozy feel of the kitchen. The online tool even allowed me to create a 3D walkthroughтАЪ which I shared with a friend who’s considering a kitchen renovation of her own. She was particularly impressed by the realistic rendering of the lighting and the overall atmosphere of the space. The ability to easily export and share my design was a fantastic feature of the software. It facilitated clear communication with contractorsтАЪ allowed me to easily share my vision with othersтАЪ and even inspired my friend to begin her own kitchen design journey. The entire processтАЪ from initial design to final export and sharingтАЪ was smoothтАЪ efficientтАЪ and incredibly rewardingтАЪ proving that designing a dream kitchen online can be both fun and incredibly practical.
    With a satisfying L-shaped layout as my baseтАЪ I delved into the finer detailsтАЪ transforming my digital sketch into a truly personalized design. I meticulously selected cabinet styles from the extensive library offered by the softwareтАЪ opting for sleekтАЪ modern shaker-style cabinets in a warmтАЪ honey-toned oak finish. The program allowed me to visualize these choices in real-timeтАЪ rotating the cabinets to ensure they complemented the overall aesthetic. NextтАЪ I chose countertops. I initially considered graniteтАЪ but the virtual rendering showed it clashing slightly with the cabinet color. I then experimented with quartzтАЪ settling on a beautifulтАЪ light-grey option that beautifully contrasted with the oak. The software’s realistic rendering capabilities were invaluable here. I spent a considerable amount of time tweaking the backsplashтАЪ finally settling on a subway tile pattern in a soft whiteтАЪ which provided a clean and classic look. Adding lighting was another key step. I strategically placed recessed lighting above the countertops and pendant lights above the islandтАЪ creating a warm and inviting ambiance. I even experimented with different flooring optionsтАЪ virtually laying down various types of tile and hardwood to see how they interacted with the rest of the design. I was particularly pleased with a light-colored oak wood floor that tied in seamlessly with the cabinetry. Beyond the major elementsтАЪ I focused on the smaller details. I carefully selected hardwareтАЪ opting for brushed nickel pulls and knobs that added a touch of sophistication. I also integrated various appliancesтАЪ choosing models based on their size and aestheticsтАЪ ensuring they fit harmoniously within the design. The software allowed me to fine-tune every aspectтАЪ from the placement of outlets to the positioning of spice racksтАЪ ensuring a highly functional and visually appealing kitchen. It was a truly rewarding processтАЪ seeing my initial concept evolve into a cohesive and detailed designтАЪ ready to be shared and potentially implemented in the real world. The level of customization was impressiveтАЪ allowing me to create a space that was uniquely mine.
    Experimenting with Different Layouts
    Exporting and Sharing My Design
    My Free Online Kitchen Design Journey

  32. Leonardhob より:

    Hi there,

    I recently discovered a amazing site that made things easier when I was exploring options for fun and engaging online platforms. The website makes everything simple to understand and guided me perfectly.

    If you’re in need of a entertaining resources, I highly recommend checking it out: [url=https://primegambling.org/]https://primegambling.org/[/url].

    Hope it’s helpful.

  33. вывести из запоя [url=https://vyvod-iz-zapoya-rostov224.ru/]вывести из запоя[/url] .

  34. make a stamp online [url=https://stamp-creator-online0.com/]make a stamp online[/url] .

  35. Jasonhen より:

    Order traffic to the site [url=https://traftop.biz/]traftop.biz[/url] fast. Traftop traffic exchange is effective and completely harmless promotion of site

  36. вывод из запоя на дому ростов круглосуточно [url=www.vyvod-iz-zapoya-rostov225.ru/]вывод из запоя на дому ростов круглосуточно[/url] .

  37. вывод из запоя на дому ростов [url=https://www.vyvod-iz-zapoya-rostov226.ru]вывод из запоя на дому ростов[/url] .

  38. вывод. из. запоя. анонимно. ростов. [url=http://vyvod-iz-zapoya-rostov27.ru/]http://vyvod-iz-zapoya-rostov27.ru/[/url] .

  39. IvoryRhymn より:

    technosoul.ru

    [url=https://infakts.ru/]infakts.ru[/url]

  40. Timothyshunc より:

    Experimenting with Different Layouts
    Inputting My Measurements and Preferences

    https://instepnews.com/automotive-news/my-journey-through-1980s-car-interiors/

    My kitchen renovation started with a daunting taskтБЪ finding the perfect free online design tool. I initially felt overwhelmed by the sheer number of options available. I spent several days researchingтАЪ reading reviewsтАЪ and comparing features. Some platforms boasted impressive 3D rendering capabilitiesтАЪ but lacked the intuitive interface I craved. Others offered simpler designs but lacked customization options. I needed a balance of visual appeal and user-friendliness. After much deliberationтАЪ I settled on “KitchenCraft ProтАЪ” a platform recommended by a friendтАЪ Amelia. KitchenCraft Pro offered a user-friendly drag-and-drop interfaceтАЪ a wide selection of appliances and cabinetry stylesтАЪ and surprisingly detailed customization options. The initial learning curve was minimal; I was able to navigate the software and start designing within minutes. I particularly appreciated the ability to import my own images and textures to personalize the designтАЪ ensuring it accurately reflected my unique style and preferences. The free version provided ample features for my needsтАЪ although I did note that some advanced featuresтАЪ like photorealistic renderingтАЪ were reserved for paid subscriptions. HoweverтАЪ for my purposesтАЪ the free tools were more than sufficient. The decision to use KitchenCraft Pro proved to be a great oneтАЪ setting the stage for a successful and enjoyable design process. I highly recommend thoroughly researching and comparing different free online kitchen design tools before making your choiceтАЪ to ensure you find one that best suits your specific needs and skill level. Remember to look for intuitive interfacesтАЪ a wide range of optionsтАЪ and helpful tutorials or support resources.
    Once I finalized my dream kitchen layoutтАЪ exporting the design was surprisingly straightforward. The online tool offered several options; I chose to download high-resolution imagesтАЪ perfect for sharing with family and friends. The images were incredibly detailedтАЪ capturing every element of my designтАЪ from the subtle grain of the oak cabinets to the precise dimensions of the countertops. I also created a detailed PDF planтАЪ which included measurementsтАЪ appliance specificationsтАЪ and a comprehensive materials list. This was invaluable for potential contractorsтАЪ providing them with all the information they needed to accurately estimate costs and timelines. Sharing my design was incredibly easy. I emailed the images and PDF to several contractors I’d contactedтАЪ and the clarity of the visuals made communication seamless. They were all impressed by the level of detail and professionalism of the digital plans. I also shared my design on social mediaтАЪ posting the images to my Instagram account. My friends and family were amazed by the transformationтАЪ praising the modernтАЪ yet cozy feel of the kitchen. The online tool even allowed me to create a 3D walkthroughтАЪ which I shared with a friend who’s considering a kitchen renovation of her own. She was particularly impressed by the realistic rendering of the lighting and the overall atmosphere of the space. The ability to easily export and share my design was a fantastic feature of the software. It facilitated clear communication with contractorsтАЪ allowed me to easily share my vision with othersтАЪ and even inspired my friend to begin her own kitchen design journey. The entire processтАЪ from initial design to final export and sharingтАЪ was smoothтАЪ efficientтАЪ and incredibly rewardingтАЪ proving that designing a dream kitchen online can be both fun and incredibly practical.
    After inputting my measurements and preferencesтАЪ I dove headfirst into the exciting world of layout experimentation. KitchenCraft Pro offered a plethora of optionsтАЪ from the classic galley style to the more spacious L-shape and U-shape designs. I started by exploring the galley layoutтАЪ digitally dragging and dropping cabinets and appliances to visualize the workflow. I quickly realized it wouldn’t suit my needs тАУ the limited counter space was a major drawback. NextтАЪ I experimented with an L-shape configurationтАЪ strategically placing the sinkтАЪ stoveтАЪ and refrigerator to form an efficient work triangle. This felt more promising. I meticulously adjusted the placement of islands and peninsulasтАЪ carefully considering their impact on traffic flow and overall spaciousness. The software’s intuitive drag-and-drop functionality made this process remarkably easy and enjoyable. I even tried a daring U-shaped designтАЪ envisioning a grandтАЪ chef-like workspace. While initially appealingтАЪ I found it slightly cramped for my needs. The software allowed me to easily switch between different layoutsтАЪ instantly visualizing the impact of each change. I spent hours tweaking the arrangement of cabinetsтАЪ appliancesтАЪ and workspacesтАЪ constantly evaluating the practicality and aesthetic appeal of each configuration; I played around with different cabinet depths and widthsтАЪ experimenting with the placement of pantry units and maximizing storage space. I even considered adding a breakfast bar to one of the layoutsтАЪ envisioning family gatherings around it. The ability to instantly see the results of my adjustments was invaluableтАЪ allowing me to make informed decisions based on both functionality and personal preference. It was a truly iterative processтАЪ refining and perfecting the design until I found the perfect balance between form and function. Through this experimentationтАЪ I discovered that the L-shape layoutтАЪ with a cleverly positioned islandтАЪ provided the optimal blend of efficiency and spaciousness for my kitchen.
    With a satisfying L-shaped layout as my baseтАЪ I delved into the finer detailsтАЪ transforming my digital sketch into a truly personalized design. I meticulously selected cabinet styles from the extensive library offered by the softwareтАЪ opting for sleekтАЪ modern shaker-style cabinets in a warmтАЪ honey-toned oak finish. The program allowed me to visualize these choices in real-timeтАЪ rotating the cabinets to ensure they complemented the overall aesthetic. NextтАЪ I chose countertops. I initially considered graniteтАЪ but the virtual rendering showed it clashing slightly with the cabinet color. I then experimented with quartzтАЪ settling on a beautifulтАЪ light-grey option that beautifully contrasted with the oak. The software’s realistic rendering capabilities were invaluable here. I spent a considerable amount of time tweaking the backsplashтАЪ finally settling on a subway tile pattern in a soft whiteтАЪ which provided a clean and classic look. Adding lighting was another key step. I strategically placed recessed lighting above the countertops and pendant lights above the islandтАЪ creating a warm and inviting ambiance. I even experimented with different flooring optionsтАЪ virtually laying down various types of tile and hardwood to see how they interacted with the rest of the design. I was particularly pleased with a light-colored oak wood floor that tied in seamlessly with the cabinetry. Beyond the major elementsтАЪ I focused on the smaller details. I carefully selected hardwareтАЪ opting for brushed nickel pulls and knobs that added a touch of sophistication. I also integrated various appliancesтАЪ choosing models based on their size and aestheticsтАЪ ensuring they fit harmoniously within the design. The software allowed me to fine-tune every aspectтАЪ from the placement of outlets to the positioning of spice racksтАЪ ensuring a highly functional and visually appealing kitchen. It was a truly rewarding processтАЪ seeing my initial concept evolve into a cohesive and detailed designтАЪ ready to be shared and potentially implemented in the real world. The level of customization was impressiveтАЪ allowing me to create a space that was uniquely mine.
    Refining the Design and Adding Details

  41. JustinAdalE より:

    Смотреть здесь https://zelenka.guru/forums/9/

  42. IvoryRhymn より:

    ladyinfanta.ru

    [url=https://fkdominvest.ru/]fkdominvest.ru[/url]

  43. Timothyshunc より:

    Once I finalized my dream kitchen layoutтАЪ exporting the design was surprisingly straightforward. The online tool offered several options; I chose to download high-resolution imagesтАЪ perfect for sharing with family and friends. The images were incredibly detailedтАЪ capturing every element of my designтАЪ from the subtle grain of the oak cabinets to the precise dimensions of the countertops. I also created a detailed PDF planтАЪ which included measurementsтАЪ appliance specificationsтАЪ and a comprehensive materials list. This was invaluable for potential contractorsтАЪ providing them with all the information they needed to accurately estimate costs and timelines. Sharing my design was incredibly easy. I emailed the images and PDF to several contractors I’d contactedтАЪ and the clarity of the visuals made communication seamless. They were all impressed by the level of detail and professionalism of the digital plans. I also shared my design on social mediaтАЪ posting the images to my Instagram account. My friends and family were amazed by the transformationтАЪ praising the modernтАЪ yet cozy feel of the kitchen. The online tool even allowed me to create a 3D walkthroughтАЪ which I shared with a friend who’s considering a kitchen renovation of her own. She was particularly impressed by the realistic rendering of the lighting and the overall atmosphere of the space. The ability to easily export and share my design was a fantastic feature of the software. It facilitated clear communication with contractorsтАЪ allowed me to easily share my vision with othersтАЪ and even inspired my friend to begin her own kitchen design journey. The entire processтАЪ from initial design to final export and sharingтАЪ was smoothтАЪ efficientтАЪ and incredibly rewardingтАЪ proving that designing a dream kitchen online can be both fun and incredibly practical.
    After inputting my measurements and preferencesтАЪ I dove headfirst into the exciting world of layout experimentation. KitchenCraft Pro offered a plethora of optionsтАЪ from the classic galley style to the more spacious L-shape and U-shape designs. I started by exploring the galley layoutтАЪ digitally dragging and dropping cabinets and appliances to visualize the workflow. I quickly realized it wouldn’t suit my needs тАУ the limited counter space was a major drawback. NextтАЪ I experimented with an L-shape configurationтАЪ strategically placing the sinkтАЪ stoveтАЪ and refrigerator to form an efficient work triangle. This felt more promising. I meticulously adjusted the placement of islands and peninsulasтАЪ carefully considering their impact on traffic flow and overall spaciousness. The software’s intuitive drag-and-drop functionality made this process remarkably easy and enjoyable. I even tried a daring U-shaped designтАЪ envisioning a grandтАЪ chef-like workspace. While initially appealingтАЪ I found it slightly cramped for my needs. The software allowed me to easily switch between different layoutsтАЪ instantly visualizing the impact of each change. I spent hours tweaking the arrangement of cabinetsтАЪ appliancesтАЪ and workspacesтАЪ constantly evaluating the practicality and aesthetic appeal of each configuration; I played around with different cabinet depths and widthsтАЪ experimenting with the placement of pantry units and maximizing storage space. I even considered adding a breakfast bar to one of the layoutsтАЪ envisioning family gatherings around it. The ability to instantly see the results of my adjustments was invaluableтАЪ allowing me to make informed decisions based on both functionality and personal preference. It was a truly iterative processтАЪ refining and perfecting the design until I found the perfect balance between form and function. Through this experimentationтАЪ I discovered that the L-shape layoutтАЪ with a cleverly positioned islandтАЪ provided the optimal blend of efficiency and spaciousness for my kitchen.

    With my chosen design toolтАЪ KitchenCraft ProтАЪ selectedтАЪ the next step was inputting my kitchen’s precise measurements. This proved surprisingly straightforward. The software guided me through a step-by-step processтАЪ prompting me to enter the length and width of each wallтАЪ the location of windows and doorsтАЪ and the dimensions of existing fixtures like sinks and ovens. I found the interface incredibly intuitiveтАЪ with clear instructions and helpful visual aids. I even appreciated the option to upload a floor plan image to assist with the process. InitiallyтАЪ I struggled a bit with accurately measuring some awkwardly shaped alcovesтАЪ but the platform’s customer support chat was incredibly helpfulтАЪ providing quick and efficient guidance. Once the dimensions were finalizedтАЪ I began to personalize the design. This is where the fun really started! I selected my preferred cabinet stylesтАЪ choosing from a comprehensive library of options ranging from sleek modern designs to more traditionalтАЪ rustic styles. I meticulously chose the colorsтАЪ finishesтАЪ and countertop materialsтАЪ experimenting with different combinations to find the perfect aesthetic. I even incorporated my existing appliancesтАЪ ensuring they fit seamlessly into the new layout. The software allowed for precise placement of every elementтАЪ down to the smallest detail. I spent hours tweaking and refiningтАЪ meticulously considering factors such as workflow efficiency and aesthetic harmony. The process felt like playing a sophisticated digital puzzleтАЪ and the satisfaction of seeing my vision slowly take shape on the screen was incredibly rewarding. I discovered that the software’s flexibility allowed me to explore different layouts and experiment with various design choices without any commitmentтАЪ a feature I truly appreciated. It was a crucial step in ensuring my final design would be both functional and visually appealing.
    I embarked on a thrilling kitchen redesignтАЪ leveraging free online tools. My goal? A stunningтАЪ functional space without breaking the bank. I spent hours exploring various platformsтАЪ comparing features and ease of use. The process felt surprisingly intuitive. I was amazed by how quickly I could visualize different layouts and experiment with various appliances and cabinetry. It was a fun and empowering experienceтАЪ proving that achieving a dream kitchen doesn’t require a hefty budget!
    Exporting and Sharing My Design
    My kitchen renovation started with a daunting taskтБЪ finding the perfect free online design tool. I initially felt overwhelmed by the sheer number of options available. I spent several days researchingтАЪ reading reviewsтАЪ and comparing features. Some platforms boasted impressive 3D rendering capabilitiesтАЪ but lacked the intuitive interface I craved. Others offered simpler designs but lacked customization options. I needed a balance of visual appeal and user-friendliness. After much deliberationтАЪ I settled on “KitchenCraft ProтАЪ” a platform recommended by a friendтАЪ Amelia. KitchenCraft Pro offered a user-friendly drag-and-drop interfaceтАЪ a wide selection of appliances and cabinetry stylesтАЪ and surprisingly detailed customization options. The initial learning curve was minimal; I was able to navigate the software and start designing within minutes. I particularly appreciated the ability to import my own images and textures to personalize the designтАЪ ensuring it accurately reflected my unique style and preferences. The free version provided ample features for my needsтАЪ although I did note that some advanced featuresтАЪ like photorealistic renderingтАЪ were reserved for paid subscriptions. HoweverтАЪ for my purposesтАЪ the free tools were more than sufficient. The decision to use KitchenCraft Pro proved to be a great oneтАЪ setting the stage for a successful and enjoyable design process. I highly recommend thoroughly researching and comparing different free online kitchen design tools before making your choiceтАЪ to ensure you find one that best suits your specific needs and skill level. Remember to look for intuitive interfacesтАЪ a wide range of optionsтАЪ and helpful tutorials or support resources.
    Refining the Design and Adding Details

  44. Johnnymaind より:

    Помощь [url=https://xrust.ru/games/review/295554-pomosch-fallout-shelter-otvety-na-voprosy-poteryay-golovu-6.html]Fallout Shelter. Ответы на вопросы «Потеряй голову»[/url]
    Вариант 6 – Ланчбокс в награду!

    – Как Братство Стали прибыло в Содружество?
    – На летающем корабле.

    –Кто из Братства Стали укрылся в здании Кэмбриджского полицейского участка?
    – Паладин Данс и скриптор Хэйлин.

    –Какой продвинутой технологией пользуются многие бойцы Братства Стали?
    – Силовой броней.

    – Что искало Братство Стали в штаб-квартире «Масс Фьюжн»?
    – Бериллиевый импеллер.

    [url=https://xrust.ru/games/]Игра Fallout Shelter[/url]

  45. Timothyshunc より:

    With my chosen design toolтАЪ KitchenCraft ProтАЪ selectedтАЪ the next step was inputting my kitchen’s precise measurements. This proved surprisingly straightforward. The software guided me through a step-by-step processтАЪ prompting me to enter the length and width of each wallтАЪ the location of windows and doorsтАЪ and the dimensions of existing fixtures like sinks and ovens. I found the interface incredibly intuitiveтАЪ with clear instructions and helpful visual aids. I even appreciated the option to upload a floor plan image to assist with the process. InitiallyтАЪ I struggled a bit with accurately measuring some awkwardly shaped alcovesтАЪ but the platform’s customer support chat was incredibly helpfulтАЪ providing quick and efficient guidance. Once the dimensions were finalizedтАЪ I began to personalize the design. This is where the fun really started! I selected my preferred cabinet stylesтАЪ choosing from a comprehensive library of options ranging from sleek modern designs to more traditionalтАЪ rustic styles. I meticulously chose the colorsтАЪ finishesтАЪ and countertop materialsтАЪ experimenting with different combinations to find the perfect aesthetic. I even incorporated my existing appliancesтАЪ ensuring they fit seamlessly into the new layout. The software allowed for precise placement of every elementтАЪ down to the smallest detail. I spent hours tweaking and refiningтАЪ meticulously considering factors such as workflow efficiency and aesthetic harmony. The process felt like playing a sophisticated digital puzzleтАЪ and the satisfaction of seeing my vision slowly take shape on the screen was incredibly rewarding. I discovered that the software’s flexibility allowed me to explore different layouts and experiment with various design choices without any commitmentтАЪ a feature I truly appreciated. It was a crucial step in ensuring my final design would be both functional and visually appealing.
    After inputting my measurements and preferencesтАЪ I dove headfirst into the exciting world of layout experimentation. KitchenCraft Pro offered a plethora of optionsтАЪ from the classic galley style to the more spacious L-shape and U-shape designs. I started by exploring the galley layoutтАЪ digitally dragging and dropping cabinets and appliances to visualize the workflow. I quickly realized it wouldn’t suit my needs тАУ the limited counter space was a major drawback. NextтАЪ I experimented with an L-shape configurationтАЪ strategically placing the sinkтАЪ stoveтАЪ and refrigerator to form an efficient work triangle. This felt more promising. I meticulously adjusted the placement of islands and peninsulasтАЪ carefully considering their impact on traffic flow and overall spaciousness. The software’s intuitive drag-and-drop functionality made this process remarkably easy and enjoyable. I even tried a daring U-shaped designтАЪ envisioning a grandтАЪ chef-like workspace. While initially appealingтАЪ I found it slightly cramped for my needs. The software allowed me to easily switch between different layoutsтАЪ instantly visualizing the impact of each change. I spent hours tweaking the arrangement of cabinetsтАЪ appliancesтАЪ and workspacesтАЪ constantly evaluating the practicality and aesthetic appeal of each configuration; I played around with different cabinet depths and widthsтАЪ experimenting with the placement of pantry units and maximizing storage space. I even considered adding a breakfast bar to one of the layoutsтАЪ envisioning family gatherings around it. The ability to instantly see the results of my adjustments was invaluableтАЪ allowing me to make informed decisions based on both functionality and personal preference. It was a truly iterative processтАЪ refining and perfecting the design until I found the perfect balance between form and function. Through this experimentationтАЪ I discovered that the L-shape layoutтАЪ with a cleverly positioned islandтАЪ provided the optimal blend of efficiency and spaciousness for my kitchen.

    https://instepnews.com/technology/aereos-quasilegal-tv-streaming?-my-experience/

    Once I finalized my dream kitchen layoutтАЪ exporting the design was surprisingly straightforward. The online tool offered several options; I chose to download high-resolution imagesтАЪ perfect for sharing with family and friends. The images were incredibly detailedтАЪ capturing every element of my designтАЪ from the subtle grain of the oak cabinets to the precise dimensions of the countertops. I also created a detailed PDF planтАЪ which included measurementsтАЪ appliance specificationsтАЪ and a comprehensive materials list. This was invaluable for potential contractorsтАЪ providing them with all the information they needed to accurately estimate costs and timelines. Sharing my design was incredibly easy. I emailed the images and PDF to several contractors I’d contactedтАЪ and the clarity of the visuals made communication seamless. They were all impressed by the level of detail and professionalism of the digital plans. I also shared my design on social mediaтАЪ posting the images to my Instagram account. My friends and family were amazed by the transformationтАЪ praising the modernтАЪ yet cozy feel of the kitchen. The online tool even allowed me to create a 3D walkthroughтАЪ which I shared with a friend who’s considering a kitchen renovation of her own. She was particularly impressed by the realistic rendering of the lighting and the overall atmosphere of the space. The ability to easily export and share my design was a fantastic feature of the software. It facilitated clear communication with contractorsтАЪ allowed me to easily share my vision with othersтАЪ and even inspired my friend to begin her own kitchen design journey. The entire processтАЪ from initial design to final export and sharingтАЪ was smoothтАЪ efficientтАЪ and incredibly rewardingтАЪ proving that designing a dream kitchen online can be both fun and incredibly practical.
    Exporting and Sharing My Design
    I embarked on a thrilling kitchen redesignтАЪ leveraging free online tools. My goal? A stunningтАЪ functional space without breaking the bank. I spent hours exploring various platformsтАЪ comparing features and ease of use. The process felt surprisingly intuitive. I was amazed by how quickly I could visualize different layouts and experiment with various appliances and cabinetry. It was a fun and empowering experienceтАЪ proving that achieving a dream kitchen doesn’t require a hefty budget!
    Refining the Design and Adding Details
    After inputting my measurements and preferencesтАЪ I dove headfirst into the exciting world of layout experimentation. KitchenCraft Pro offered a plethora of optionsтАЪ from the classic galley style to the more spacious L-shape and U-shape designs. I started by exploring the galley layoutтАЪ digitally dragging and dropping cabinets and appliances to visualize the workflow. I quickly realized it wouldn’t suit my needs тАУ the limited counter space was a major drawback. NextтАЪ I experimented with an L-shape configurationтАЪ strategically placing the sinkтАЪ stoveтАЪ and refrigerator to form an efficient work triangle. This felt more promising. I meticulously adjusted the placement of islands and peninsulasтАЪ carefully considering their impact on traffic flow and overall spaciousness. The software’s intuitive drag-and-drop functionality made this process remarkably easy and enjoyable. I even tried a daring U-shaped designтАЪ envisioning a grandтАЪ chef-like workspace. While initially appealingтАЪ I found it slightly cramped for my needs. The software allowed me to easily switch between different layoutsтАЪ instantly visualizing the impact of each change. I spent hours tweaking the arrangement of cabinetsтАЪ appliancesтАЪ and workspacesтАЪ constantly evaluating the practicality and aesthetic appeal of each configuration; I played around with different cabinet depths and widthsтАЪ experimenting with the placement of pantry units and maximizing storage space. I even considered adding a breakfast bar to one of the layoutsтАЪ envisioning family gatherings around it. The ability to instantly see the results of my adjustments was invaluableтАЪ allowing me to make informed decisions based on both functionality and personal preference. It was a truly iterative processтАЪ refining and perfecting the design until I found the perfect balance between form and function. Through this experimentationтАЪ I discovered that the L-shape layoutтАЪ with a cleverly positioned islandтАЪ provided the optimal blend of efficiency and spaciousness for my kitchen.

  46. Timothyshunc より:

    After inputting my measurements and preferencesтАЪ I dove headfirst into the exciting world of layout experimentation. KitchenCraft Pro offered a plethora of optionsтАЪ from the classic galley style to the more spacious L-shape and U-shape designs. I started by exploring the galley layoutтАЪ digitally dragging and dropping cabinets and appliances to visualize the workflow. I quickly realized it wouldn’t suit my needs тАУ the limited counter space was a major drawback. NextтАЪ I experimented with an L-shape configurationтАЪ strategically placing the sinkтАЪ stoveтАЪ and refrigerator to form an efficient work triangle. This felt more promising. I meticulously adjusted the placement of islands and peninsulasтАЪ carefully considering their impact on traffic flow and overall spaciousness. The software’s intuitive drag-and-drop functionality made this process remarkably easy and enjoyable. I even tried a daring U-shaped designтАЪ envisioning a grandтАЪ chef-like workspace. While initially appealingтАЪ I found it slightly cramped for my needs. The software allowed me to easily switch between different layoutsтАЪ instantly visualizing the impact of each change. I spent hours tweaking the arrangement of cabinetsтАЪ appliancesтАЪ and workspacesтАЪ constantly evaluating the practicality and aesthetic appeal of each configuration; I played around with different cabinet depths and widthsтАЪ experimenting with the placement of pantry units and maximizing storage space. I even considered adding a breakfast bar to one of the layoutsтАЪ envisioning family gatherings around it. The ability to instantly see the results of my adjustments was invaluableтАЪ allowing me to make informed decisions based on both functionality and personal preference. It was a truly iterative processтАЪ refining and perfecting the design until I found the perfect balance between form and function. Through this experimentationтАЪ I discovered that the L-shape layoutтАЪ with a cleverly positioned islandтАЪ provided the optimal blend of efficiency and spaciousness for my kitchen.
    Inputting My Measurements and Preferences

    https://instepnews.com/automotive-news/my-1992-lincoln-town-car-transmission-troubles/

    I embarked on a thrilling kitchen redesignтАЪ leveraging free online tools. My goal? A stunningтАЪ functional space without breaking the bank. I spent hours exploring various platformsтАЪ comparing features and ease of use. The process felt surprisingly intuitive. I was amazed by how quickly I could visualize different layouts and experiment with various appliances and cabinetry. It was a fun and empowering experienceтАЪ proving that achieving a dream kitchen doesn’t require a hefty budget!
    After inputting my measurements and preferencesтАЪ I dove headfirst into the exciting world of layout experimentation. KitchenCraft Pro offered a plethora of optionsтАЪ from the classic galley style to the more spacious L-shape and U-shape designs. I started by exploring the galley layoutтАЪ digitally dragging and dropping cabinets and appliances to visualize the workflow. I quickly realized it wouldn’t suit my needs тАУ the limited counter space was a major drawback. NextтАЪ I experimented with an L-shape configurationтАЪ strategically placing the sinkтАЪ stoveтАЪ and refrigerator to form an efficient work triangle. This felt more promising. I meticulously adjusted the placement of islands and peninsulasтАЪ carefully considering their impact on traffic flow and overall spaciousness. The software’s intuitive drag-and-drop functionality made this process remarkably easy and enjoyable. I even tried a daring U-shaped designтАЪ envisioning a grandтАЪ chef-like workspace. While initially appealingтАЪ I found it slightly cramped for my needs. The software allowed me to easily switch between different layoutsтАЪ instantly visualizing the impact of each change. I spent hours tweaking the arrangement of cabinetsтАЪ appliancesтАЪ and workspacesтАЪ constantly evaluating the practicality and aesthetic appeal of each configuration; I played around with different cabinet depths and widthsтАЪ experimenting with the placement of pantry units and maximizing storage space. I even considered adding a breakfast bar to one of the layoutsтАЪ envisioning family gatherings around it. The ability to instantly see the results of my adjustments was invaluableтАЪ allowing me to make informed decisions based on both functionality and personal preference. It was a truly iterative processтАЪ refining and perfecting the design until I found the perfect balance between form and function. Through this experimentationтАЪ I discovered that the L-shape layoutтАЪ with a cleverly positioned islandтАЪ provided the optimal blend of efficiency and spaciousness for my kitchen.
    With a satisfying L-shaped layout as my baseтАЪ I delved into the finer detailsтАЪ transforming my digital sketch into a truly personalized design. I meticulously selected cabinet styles from the extensive library offered by the softwareтАЪ opting for sleekтАЪ modern shaker-style cabinets in a warmтАЪ honey-toned oak finish. The program allowed me to visualize these choices in real-timeтАЪ rotating the cabinets to ensure they complemented the overall aesthetic. NextтАЪ I chose countertops. I initially considered graniteтАЪ but the virtual rendering showed it clashing slightly with the cabinet color. I then experimented with quartzтАЪ settling on a beautifulтАЪ light-grey option that beautifully contrasted with the oak. The software’s realistic rendering capabilities were invaluable here. I spent a considerable amount of time tweaking the backsplashтАЪ finally settling on a subway tile pattern in a soft whiteтАЪ which provided a clean and classic look. Adding lighting was another key step. I strategically placed recessed lighting above the countertops and pendant lights above the islandтАЪ creating a warm and inviting ambiance. I even experimented with different flooring optionsтАЪ virtually laying down various types of tile and hardwood to see how they interacted with the rest of the design. I was particularly pleased with a light-colored oak wood floor that tied in seamlessly with the cabinetry. Beyond the major elementsтАЪ I focused on the smaller details. I carefully selected hardwareтАЪ opting for brushed nickel pulls and knobs that added a touch of sophistication. I also integrated various appliancesтАЪ choosing models based on their size and aestheticsтАЪ ensuring they fit harmoniously within the design. The software allowed me to fine-tune every aspectтАЪ from the placement of outlets to the positioning of spice racksтАЪ ensuring a highly functional and visually appealing kitchen. It was a truly rewarding processтАЪ seeing my initial concept evolve into a cohesive and detailed designтАЪ ready to be shared and potentially implemented in the real world. The level of customization was impressiveтАЪ allowing me to create a space that was uniquely mine.
    Choosing the Right Online Tool
    With my chosen design toolтАЪ KitchenCraft ProтАЪ selectedтАЪ the next step was inputting my kitchen’s precise measurements. This proved surprisingly straightforward. The software guided me through a step-by-step processтАЪ prompting me to enter the length and width of each wallтАЪ the location of windows and doorsтАЪ and the dimensions of existing fixtures like sinks and ovens. I found the interface incredibly intuitiveтАЪ with clear instructions and helpful visual aids. I even appreciated the option to upload a floor plan image to assist with the process. InitiallyтАЪ I struggled a bit with accurately measuring some awkwardly shaped alcovesтАЪ but the platform’s customer support chat was incredibly helpfulтАЪ providing quick and efficient guidance. Once the dimensions were finalizedтАЪ I began to personalize the design. This is where the fun really started! I selected my preferred cabinet stylesтАЪ choosing from a comprehensive library of options ranging from sleek modern designs to more traditionalтАЪ rustic styles. I meticulously chose the colorsтАЪ finishesтАЪ and countertop materialsтАЪ experimenting with different combinations to find the perfect aesthetic. I even incorporated my existing appliancesтАЪ ensuring they fit seamlessly into the new layout. The software allowed for precise placement of every elementтАЪ down to the smallest detail. I spent hours tweaking and refiningтАЪ meticulously considering factors such as workflow efficiency and aesthetic harmony. The process felt like playing a sophisticated digital puzzleтАЪ and the satisfaction of seeing my vision slowly take shape on the screen was incredibly rewarding. I discovered that the software’s flexibility allowed me to explore different layouts and experiment with various design choices without any commitmentтАЪ a feature I truly appreciated. It was a crucial step in ensuring my final design would be both functional and visually appealing.

  47. нарколог на дом вывод из запоя ростов [url=www.vyvod-iz-zapoya-rostov229.ru]нарколог на дом вывод из запоя ростов[/url] .

  48. выведение из запоя ростов на дону [url=http://vyvod-iz-zapoya-rostov228.ru]выведение из запоя ростов на дону[/url] .

  49. RichardJedly より:

    [b][url=https://nuru.manhattan-massage.com]where is nuru massage[/url][/b]

    The Ultimate Overview to Uru Massage: Benefits, Methods, and Why You Ought to Try It
    Intro
    In today’s fast-paced world, many people are seeking alternative ways to ease anxiety and improve their overall well-being. One approach gaining interest is Uru Massage therapy, a deeply corrective exercise with origins in ancient practices. This massage not just relaxes the body but additionally straightens the mind and spirit, making it a complete health service.

    However just what is Uru Massage, and how can it transform your life? Allow’s discover whatever you require to learn about this unique treatment, from its beginnings to its strategies and benefits.

    What Is Uru Massage?
    Historical Background
    Uru Massage stems from ancient recovery methods that stress equilibrium and consistency within the body. Its origins can be traced to native cultures that valued the interconnectedness of mind, body, and spirit. Unlike modern-day restorative approaches, Uru Massage integrates physical control with spiritual mindfulness.

    Core Concepts and Unique Attributes
    The core principle of Uru Massage is the restoration of power circulation via certain strategies. It blends deep cells deal with rhythmic activities and commonly integrates all-natural oils and aromatherapy to boost the experience.

    Benefits of Uru Massage
    Physical Health Conveniences
    Uru Massage is exceptional for soothing muscle tension, enhancing blood circulation, and advertising much better stance. It can also assist with persistent pain, specifically in the back, shoulders, and neck.

    Mental and Psychological Health
    This massage method is renowned for lowering stress and anxiousness. By boosting pressure factors, it motivates the launch of endorphins, leaving you really feeling uplifted and tranquil.

    Spiritual Placement
    For those seeking spiritual wellness, Uru Massage uses a profound sense of balance. The technique includes mindfulness, allowing clients to reconnect with their psyches.

    How Uru Massage Differs from Various Other Massage Therapy Methods
    Contrast with Swedish Massage
    While Swedish massage concentrates on long, sweeping strokes to loosen up muscular tissues, Uru Massage therapy goes much deeper, targeting power points for long lasting relief.

    Distinction from Deep Cells Massage Therapy
    Unlike deep tissue massage therapy, which typically triggers pain, Uru Massage uses gentler strategies to achieve similar benefits without the discomfort.

    Unique Social Facets
    Uru Massage therapy stands apart for its combination of cultural rituals, making the experience both healing and mentally enhancing.

  50. пропуск для грузового транспорта в москву [url=https://urilin.ru /]пропуск для грузового транспорта в москву[/url] .

  51. IvoryRhymn より:

    Inputting My Measurements and Preferences
    My Free Online Kitchen Design Journey

    tak-stroy.ru

    Over time, sediment—a mixture of minerals and rust—accumulates at the bottom of your hot water heater tank. This sediment is a byproduct of the water heating process and the minerals present in your water supply. Think of it like a slow, steady build-up of sludge. This sediment acts as an insulator, reducing the tank’s ability to transfer heat effectively. Consequently, your water heater works harder to reach the desired temperature, leading to increased energy consumption and higher utility bills. This increased workload puts extra stress on the heating elements and other internal components, potentially shortening the lifespan of your appliance and increasing the risk of premature failure. A build-up of sediment can also cause the water heater to become noisy, with rumbling or gurgling sounds as the sediment is agitated during the heating process. In severe cases, this sediment buildup can even restrict water flow, resulting in reduced hot water pressure or inconsistent hot water delivery throughout your home. Regular flushing removes this sediment, restoring the heater’s efficiency, extending its lifespan, and preventing costly repairs down the line. It’s a simple preventative maintenance task that yields significant long-term benefits, ensuring you consistently enjoy reliable and efficient hot water service. Don’t underestimate the power of a simple flush; it’s a small effort with a big impact on your home’s comfort and your wallet.
    For a deeper clean‚ dedicate time each week to a more thorough cleaning. Use appropriate cleaning products for each surface. Avoid harsh chemicals that could damage delicate materials like marble or granite. Always test any new cleaning product in an inconspicuous area first. Pay close attention to grout lines‚ as these areas tend to accumulate dirt and mildew. A grout brush and appropriate cleaner are invaluable tools for maintaining clean grout lines. Regularly inspect faucets and showerheads for mineral deposits. Descaling these fixtures regularly prevents clogging and maintains optimal water flow.

タイトルとURLをコピーしました